My Favorite Treat Recipes

We’ve all had delusions of domestic grandeur. I told myself when I got married that I would learn to love cooking because it’s something I’ll be doing for the rest of my life. Alas, I never quite got bit by the Betty Crocker bug. I will cook. I can cook. But I don’t love it. I do, however, love baking treats! It’s a good exercise for me. You need to follow the recipe to a tee (since baking is basically a science experiment), which appeals to my rule-loving nature. But it’s also messy and creative, which are muscles I need to work more often. Today I’m sharing my favorite easy sweet treats. As we slowly start to emerge from this quarantine, I hope that some of the slow-down will stay with us–like making time for messy kitchens and the smell of something sweet baking in the oven.

Cake Batter Fudge

Source: Baked From A Box via Pinterest

Ingredients:

1 cup Funfetti cake mix
1 cup confectioners’ (powdered) sugar
1/2 stick (1/4 cup) butter, cut into small squares
1/4 cup milk

Instructions:

  1. Place cake mix in a microwave safe bowl. Add butter and milk. Do not stir.
  2. Microwave for 2 minutes. Stir immediately until combined.
  3. Spread into greased square pan. Refrigerate 1 hour to set up.

Notes: This makes just a small square pan of fudge. This would be a fun after school or weekend activity for kids because it’s so easy and quick, and it doesn’t make a huge amount so they can’t get too terribly overloaded on sugar.

Blueberry Lemon Quick Bread

Source: Kroger magazine (Come thru, Kroger!)

Ingredients:

1 1/2 cups flour

2 tsp baking powder

1/4 tsp salt

1/3 cup sugar

1 Tbsp lemon zest

3/4 cups milk (can use almond milk for non-dairy version)

1 egg, beaten

2 Tbsp canola oil

1 cup blueberries

For lemon glaze:

1 cup confectioners’ sugar

1-2 Tbsp lemon juice

Instructions:

  1. Preheat oven to 350. In a large mixing bowl, combine flour, baking powder, and salt; whisk well. Add the sugar and lemon zest/ stir.
  2. In another bowl, whisk together milk, egg, and canola oil. Pour the wet ingredients over the dry ingredients and stir just until combined.
  3. Toss blueberries with a few pinches of flour, and gently fold them into the batter.
  4. Pour into a greased 9×5 inch loaf pan. Bake 40-50 minutes, until a toothpick comes out clean.
  5. To make glaze, whisk together confectioner’s sugar and lemon juice until mixture is thick but pour-able.
  6. Let bread cool in pan 15 minutes, then remove from pan and place on a wire rack to continue cooling. Spoon glaze over bread in a zig-zag pattern.

Notes: This makes a great breakfast bread.

M & M Cookies

Source: Modern Honey

Ingredients:

1 cup Cold Butter (cut into cubes and microwave on high for a few seconds)
1 cup Brown Sugar
1/2 cup + 2 Tablespoons Sugar
2 large Eggs
2 teaspoons Vanilla
2 3/4 cups Flour
3/4 teaspoon Baking Soda
1 teaspoon Cornstarch
1/2 teaspoon Salt
1 bag mini M& M’s (You won’t use the whole bag, you will add them to your batter to your taste)

Instructions:

  1. Preheat oven to 400 degrees. In a large mixing bowl, cream butter, brown sugar, and sugar for 4-5 minutes until light and fluffy. Scrape the sides of the bowl halfway through to ensure even creaming.
  2. Add eggs and vanilla. Mix for 1 minute longer.
  3. Stir in flour, cornstarch, baking soda, and salt. Mix just until combined. Fold in M&M’s.
  4. Scoop cookie dough onto baking sheets. Place extra M & M’s on top of cookie dough balls so the M & M’s show up after baking.
  5. Bake for 9-11 minutes or until the edges just begin to turn a light golden color. Remove from oven and let set for 5 minutes before removing from the cookie sheet.

Notes: I grabbed a bag of mini M&M’s on a whim in the baking aisle one day and I really do think they are preferable to regular-sized if you like soft cookies. I didn’t measure them out. I just added them until the dough looked good to me and pressed four on top of each cookie. How many you add on top will depend on how large you make your cookies.

Fruit Pizzas

Ingredients:

Sugar cookie mix of your choice (break and bake, slice and bake, or a powdered mix will work fine)

1 block cream cheese, softened

1 cup brown sugar

1 Tbsp vanilla

Fruits of your choice (Blueberries, strawberries, kiwis, raspberries are good options)

Instructions:

  1. Bake cookies according to package directions. Make sure the balls of dough are smooth so the tops of the cookies will be fairly flat.
  2. Beat softened cream cheese in mixer until whipped. Add brown sugar and vanilla. Beat until smooth.
  3. Chop any non bite-sized fruit into smaller pieces.
  4. Serve as a build-your-own-fruit pizza bar or pre-make pizzas by spreading cream cheese on the cookies and adding assorted fruits on top.

Notes: These are so fun when you have company for dinner, especially during the summer. Kids can feel like they’re building their own dessert, and the icing is thick enough that it won’t turn into a total disaster mess-wise. And even if it does, it melts off with water. Grown ups can have fun, too, trying out different fruit flavor combinations. You can also make this but press the cookie dough into a greased 9×13 pan, bake, and top with dip and fruit once cooled. It makes a great 4th of July dessert with all red and blue fruits.

What treats have you been making during these crazy times? Any go-to recipes? Share them in the comments!

Easy Dinner Recipes

debby-hudson-pomybSOZsts-unsplash

If you’re like me, you dread coming up with dinner ideas each week. With a newborn baby and a husband who often works on call, getting dinner on the table is the last thing I want to deal with in a given day. With that in mind, I’m sharing some of my easy, go-to recipes. I’m not a food blogger, so there are no fancy pictures, just straightforward, fool-proof meals. The quantities listed make enough for two people in our household. One of those people is built like a Hemsworth brother and we still usually have leftovers, but if you’re feeding a family with kids, you may need to double some of the ingredients.

  1. Crockpot Hawaiian Chicken
    • Ingredients:
      • 2 chicken breasts
      • 1 can sliced pineapple in water or pineapple juice
      • Lawry’s Hawaiian or teriyaki marinade
      • 1 cup water
      • Minute rice (follow box directions for serving size)
    • Instructions:
      • Place chicken breasts in crockpot. Pour water over chicken.
      • Pour marinade over chicken.
      • Layer pineapple slices over chicken. Pour in rest of slices/juice.
      • Cook on low about 6 hours.
      • Prepare rice according to box directions.
      • Shred chicken and serve over rice.
    • Notes:
      • Choose whichever marinade gives you the flavor you want. The Hawaiian marinade is very tangy. The teriyaki is sweeter. I generally use a whole bottle of marinade because YOLO. I also use Minute rice because I cannot cook. We make one cup of rice and it’s plenty for the two of us.
  2. Sausage, rice, and beans
    • Ingredients:
      • 1 Turkey Sausage (link, not ground)
      • 1 can black beans, drained
      • 1 cup Minute rice, prepared according to box directions
      • 1 Tbsp olive oil
    • Instructions:
      • Slice sausage into bite-sized rounds
      • Heat olive oil in a skillet
      • Brown sausage in skillet once oil is hot
      • Add in beans and rice. Cook in skillet until sausage has reached desired brown-ness (I realize that sounds idiotic, but again, I’m a bad cook)
    • Notes:
      • This recipe is so simple, it’s name is just a list of the ingredients. I honestly don’t think I can legally call it a recipe. We buy a Hillshire Farms turkey sausage, but I don’t think there’s a huge difference between brands. I wouldn’t get ground sausage because I don’t think it would go as far as the link. You literally cannot mess this up. One thing I do is add the rice to the skillet before it has fully absorbed the water in the pot, that way it soaks up some of the juices from the sausage.
  3. Crock Pot White Chicken Chili
    • Ingredients:
      • 2 chicken breasts
      • 1 can yellow corn, drained
      • 1 can white beans, drained
      • 1 can diced tomatoes
      • 1 boxed chicken broth
      • 1 pack white chicken chili seasoning or taco seasoning
      • Shredded cheese (optional for serving)
      • Sour cream (optional for serving)
      • Tortilla chips (optional for serving)
    • Instructions:
      • Literally dump all ingredients in the crock pot and walk away. Cook on low around 6 hours.
    • Notes:
      • Andrew and I hate spicy food, and our definition of spicy is pretty broad. If you like a little more kick, you can get diced tomatoes with green chilies and/or opt for a spicier seasoning. This is also a great recipe to make for a group. Just double all the ingredients.
  4. Dutch oven ham & white beans
    • Ingredients:
      • 1 ham steak, diced
      • 1 can white beans
      • 1 boxed chicken broth
      • Minced garlic, to taste
    • Instructions:
      • Add all ingredients to dutch oven
      • Cook covered on medium heat, time will vary (see notes)
    • Notes:
      • The cooking time for this depends on if you get a ham steak that is pre-cooked or not. It should specify on the package. If you get a pre-cooked steak, you technically only need to let it sit in the Dutch oven until it’s heated through. If it’s not pre-cooked, dice & follow package directions for cooking…then add it to the Dutch oven to simmer with the other ingredients. For an even quicker option, buy diced ham. For some reason I’m a diva and I don’t like the way the pre-diced ham tastes, so I always just slice up a ham steak. The longer you let this recipe simmer, the more flavorful the beans will be. We usually put it on the stove an hour before we want to eat and let it cook the whole hour, turning it to low once the ingredients are heated through.
  5. Honorable mentions: other easy dinner ideas
    • Taco night-chicken or ground beef, lettuce, shredded cheese, etc. I think we all know what goes in a taco. Keep these types ingredients on hand and you can also do quesadillas, enchiladas, etc. by mixing and matching with seasonal ingredients.
    • Walmart deli pizza-so much cheaper than having pizza delivered and, in my white trash opinion, just as tasty.
    • Sandwich melts-Bust out the George Foreman and turn it into a panini press. We do tuna melts, ham & cheese melts, etc.

As you can probably surmise from this list, cooking is not my strong point. Please share in the comments if you have other easy meal ideas!

Lyla’s Nursery Reveal

NDHL1051
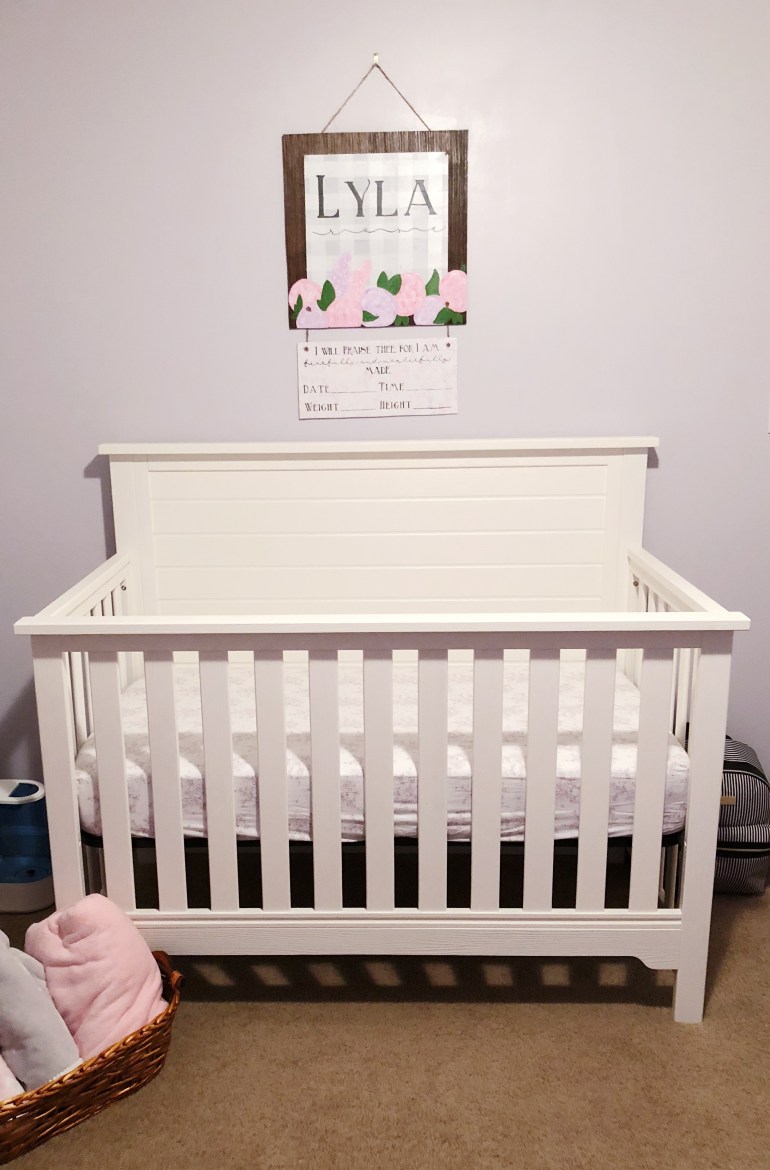
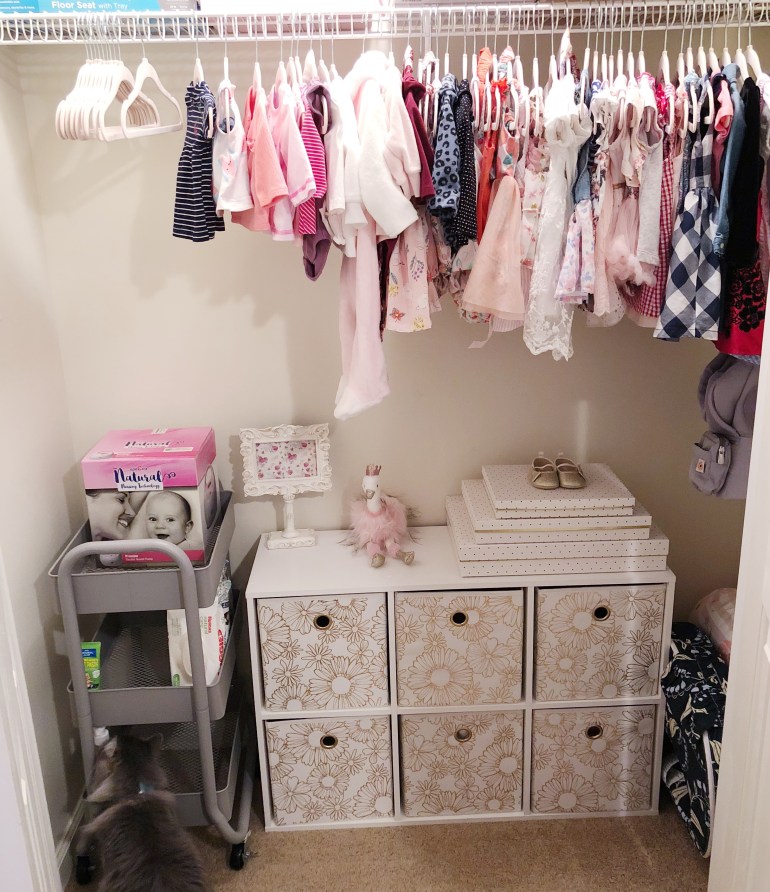
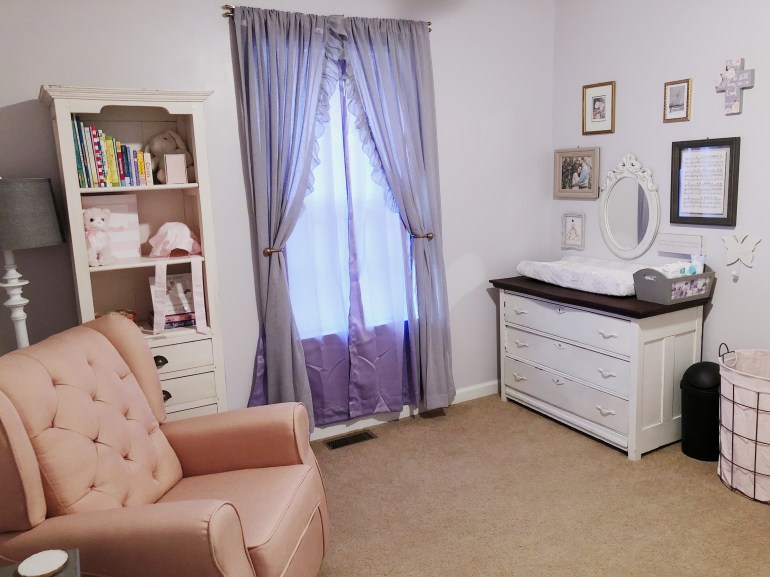
I’m so excited to share Lyla’s nursery with you! I had so much fun (and a few sleepless nights) putting this room together. Interior design is a great outlet for creativity. I think we all feel like we have an inner Joanna Gaines just waiting to come out! Today I’m sharing my inspiration for her room, how it all came together, and where all the pieces are from.

The inspo:

The first thing I chose for Lyla’s nursery was the color. I love everything pink, but I didn’t want to design a room for me. I also believe in how colors make us feel. I chose a very soft lavender because I knew it would be soothing. 

The next step was to choose a “theme.” I didn’t have anything that I wanted to commit to, so I chose Team No Theme. I just wanted the room to be soft, timeless, and feminine. I wanted it to look like a baby lived there, not an adult hipster. I knew I wanted to incorporate florals, but I didn’t want to go too crazy. I also had the luxury of knowing we are moving sometime next year when Andrew’s residency ends, so her nursery didn’t have to transition into a little girl’s room. As long as we were living in this house, it only had to be a room for a tiny baby.

MBRW5119XXDK7711

The process:

Decorating this nursery proved to be one of the hardest projects I’ve done. You only get to bring your first baby home once, and I wanted everything to be just the way I envisioned. That desire combined with pregnancy brain gave me decision paralysis like I have never had in my life. I am normally a VERY decisive person. But while putting together the nursery, I second-guessed everything. I literally lost nights of sleep over the curtains. I kept having to remind myself that all my baby actually needs is love, food, and a safe place to sleep, and I had those covered.

To somewhat preserve my sanity, I made a list and a Pinterest board of all the elements I wanted for the room. That helped me stay focused while shopping.

MHRX1007RYMD6989

RHTV0940

The sources:

I’m not a cool enough blogger to have an account where I can link all the sources for you, so I’ll list them here for those curious:

Crib: Buy Buy Baby

Dresser (used as changing table): Leah Shea Interiors in Paducah, KY

Blanket ladder: Facebook Marketplace

Paint color: Sachet by Valspar

Rocker: Target

Side table: Marshall’s

Cube storage & floral cubes: Walmart

Gallery wall: Frames are from Goodwill, Marshall’s, and At Home. Mirror and cross are from Hobby Lobby. The wooden sign is from Home Goods. The other pieces in her gallery wall are:

-“The Rose Fairy” print from this series by Cicely Mary Barker. She was an English artist in the 1920’s and 30’s, and I love her prints for nurseries or little girls’ rooms.

-Vintage sheet music for “Somewhere Over the Rainbow.” I’ve had this sheet music for years and I saved it knowing I would want it in a nursery someday.

-A vintage Barbie sketch print from a set of greeting cards like this one.

-The Art of Disney theme parks “Vision” postcard. I tried to link this but couldn’t find a source I trusted. This is a postcard I bought while I worked at Disney. It depicts the land on which Magic Kingdom is built as it looked when Walt purchased it, with a hologram of the castle over it.

That may be more detail than you ever wanted to know, but that’s the story on our little girl’s nursery! We can’t wait to bring her home!

A Classic 4th of July + Trending Hair Accessories

Processed with VSCO with c1 preset

I’ve always loved the 4th of July. Every purchase I’ve ever made of red, white, or blue clothing has been partially justified by saying “Well, this could be my 4th of July outfit!” Don’t ask me where I got the notion that my 4th of July is going to consist of a week’s worth of appearances. I just can’t turn down anything with a classic, Americana style.

Processed with VSCO with c1 preset

I’ve been wearing my hair up most days this summer. Between being pregnant and the amount of rain we’ve had, I just can’t bring myself to put more than a few minutes into my hair each day. Luckily for me, this just so happens to be the summer of hair accessories. I got this hair wrap at Walmart and I’ve worn it so many different ways. Below I’ve linked some other affordable hair accessories. I always like to try out trend pieces, especially accessories, at places like Forever 21 and Walmart. Opting for a lower price point allows me to play with trends without wasting money I could have spent on more classic pieces.

Processed with VSCO with c1 preset

I’m also linking my Pinterest board for a classic 4th of July get-together. This year my mom and I are headed to Georgia to visit my grandma and I’m already excited about all the South Georgia watermelon we’re going to eat! What are your 4th of July plans? How do you feel about the hair accessory trend? Tell me in the comments!

Classic 4th of July Pinterest Board

Star barrettes

Bow ponytail holder

Marble hair clips

Leopard claw clip set

Floral head wrap

How to Spring Clean Your Closet

00000164

We’ve finally enjoyed a few days of spring weather, and I feel like a new woman! I’ve lit my lemon-mint candle, I’ve painted my nails pastel, and I’m forging ahead with spring cleaning! One of the areas in my home that needs the most TLC is my closet. Opening your closet shouldn’t stress you out. You probably open it multiple times a day! Today I’m sharing how I go through my clothes and accessories to keep my wardrobe well-curated and my closet de-cluttered.

Eliminate Obstacles

This is my number one approach to getting rid of clothes. Every item in your closet should be something you can easily and comfortably wear. As you go through your clothes, note any obstacles that keep you from wearing them. Examples include:

-It’s itchy or uncomfortable. You’ll never wear it, and if you do, you’ll be miserable all day.

-You can only wear it with a certain bra. In my experience, that certain bra is usually uncomfortable and may require an engineering degree to put on. You’re never going to feel like going through the trouble to make it look just right and ensure no wardrobe malfunctions throughout the day.

-It only goes with one other thing in your closet (i.e. you can only make one outfit with it). I have a rule that every item in my closet has to be able to pull at least double duty. I have to be able to wear it two different places, wear it alone in summer and layered in winter, or be able to pair it with several other items in my wardrobe.

-It doesn’t fit. If something doesn’t fit, you can’t wear it. If you do wear it, you’re going to be self conscious. And every time you pass it up in your closet, it’s going to chip away at your self esteem. You’re clothes aren’t allowed to do that to you!

As you are going through and picking out your outfit for each day, if there is something you consistently skip over for any of those reasons or others, get rid of it. This will reduce so much stress in your every day routine.

00000152

Don’t get sentimental

Clothes are for wearing, not for looking at. You may have had a wonderful time in that corset-back bridesmaid’s dress, but chances are you don’t have any hand-maidens to help you get dressed in the morning. I have to remind myself that I can keep the memories without keeping the physical item. If there are items in your wardrobe that you’re only keeping because of sentimentality but you never wear them, that’s called hoarding. Choose a select few that you will wear or pass down and let go of the rest.

Make the best of your space

Andrew and I have shared a closet since we got married. The closets in our townhouse are small, so we kept our out-of-season clothes in the guest closet. No matter what we did, our closet never looked clean and there never seemed to be enough space. This year we realized we weren’t using our space efficiently. We consolidated all my stuff into the master closet and Andrew took the guest closet. Now each of our clothes are in one place and we’re not elbow to elbow trying to get ready in the mornings. Whatever space you have, make it work for you. It doesn’t have to look like Pinterest, it just needs to be functional. For example, the trend in organizing right now is to have all matching hangers. But I found that the no-slip hangers stretch out some shirts, so I use a mix of no-slip and plastic hangers. No one would Pin this photo, but this is what works for me. List out the problems with your closet, list out how you need your closet to function and what you need storage for, and compare those two lists to find solutions.

Remember that you don’t have to clean your closet all at once. Curating my wardrobe is something I do continually throughout the year. So when it’s time for spring cleaning, it’s not such a huge undertaking. Have a spot for donations in your house where you can let things collect until you’re able to make a drop off. As you get ready each morning, make note of clothes you always pass up. If you wear a pair of shoes and you’re uncomfortable all day, don’t put them back in your closet. Toss them or take them to the donate pile. Life is too short, y’all!

I promise when you get your closet cleaned out you will feel such a weight lifted off your shoulders. Getting ready will be so much easier and you’ll be free of some clutter. If you take on the challenge, tag me in your before and after pictures on social media!

My Favorite Valentine’s Day Traditions

Valentine’s Day has always been one of my favorite holidays. Now, lest you think that’s because I always had Cupid’s arrow pointed at me, let me assure you that I was single every Valentine’s Day until I met Andrew.  So why do I love it so much? Maybe it’s because pink is my favorite color. Maybe it’s because I’m super girly and love all things heart-shaped. Maybe it’s because I’m a 90’s kid and I have so many childhood memories of picking out my Valentines and painstakingly selecting the right one for each person in my class. (You had to play it cool and give your crush a really neutral one and make sure to give your best friend the cutest one.) Whatever the reason, I’ve always looked forward to February 14th. Today I’m sharing some of the traditions that have made this day fun whether I was single or in love.

IMG_6644

Exchanging small gifts

Every year until I was out of college, my mom would give us little presents on Valentine’s Day morning. It was something to look forward to, especially in high school when most of my friends were dating and I was team Forever Single. She continued the tradition by sending me care packages in college full of candy and other little treats. A gift doesn’t have to be expensive to brighten someone’s day and create a lasting memory!

Galentine’s Day

Some of the best Valentine’s Days I’ve ever spent have been with girl friends. One of my favorite days ever was in college when a floor-mate whose grandmother lived near campus opened her home to us on Valentine’s. We all got dressed up, she served us a home cooked meal, and we just hung out and talked late into the night about dating horror stories, what was going on in our lives, and everything else under the sun. Valentine’s Day is a great excuse to plan a girls’ night and get dressed up without any of the pressure of having plans with a significant other.

Rom-com marathons

I know this is super cheesy and cliche, but Valentine’s Day is all about embracing all that good stuff! Rom-coms are popular for a reason. They put you in a good mood. When so much of our entertainment is scary or stress-inducing, it’s nice to just sit and watch two people fall in love while hi-jinks ensue. Some of my favorites are 13 Going on 30, How to Lose a Guy in 10 Days, He’s Just Not That Into You, Legally Blonde (a rom com but also one of the greatest movies of our time), and 27 Dresses. For bonus points you can watch the rom-com Valentine’s Day if you really want to get festive!

IMG_6642

Heart-shaped donuts

If the phrase “heart-shaped donuts” doesn’t make you happy, I don’t know what to do with you. This became a tradition for me a few years ago. Andrew and I had been dating for six months, which is kind of the turning point in a dating relationship if you ask me. We were on our way to Dunkin Donuts for breakfast, where we got heart-shaped donuts. On the way home, we re-ignited a big argument that had been causing strain in our relationship. We realized that no matter how much we talked, we weren’t going to agree. I told Andrew that even though we disagreed, there was nothing that would make me break up with him. He realized in that moment that there was no reason he would break up with me either. That night he went home and started ring shopping. Ever since we got engaged and he told me his side of the story, I’ve celebrated Valentine’s Day with heart-shaped donuts. P.S. Despite my experience, if you’re trying to get a ring, I don’t recommend starting a fight.

Wearing a cute outfit

Real talk: I’m a grandma trapped in a 28 year old’s body. And just as Grandmas bedeck themselves in themed vests and sweaters every holiday season, I am never one to shy away from a festive outfit. 4th of July? I’m wearing red, white, and blue. Christmas? I’m gonna rock my red flannel at all the functions. And for Valentine’s Day? I’m sporting something pink, girly, and fun. I really believe that simple things, like putting together a cute outfit because you love holidays, go a long way in putting some joy in your life. Plus, if you look good, you feel good, and that affects your whole mindset for the day.

I hope these traditions will inspire you to celebrate Valentine’s Day, or at least not dread it. How are you celebrating this year? Do you love this holiday or hate it? Let me know in the comments!